
前提准备
一个域名 已实名的阿里云账号
添加站点至 ESA
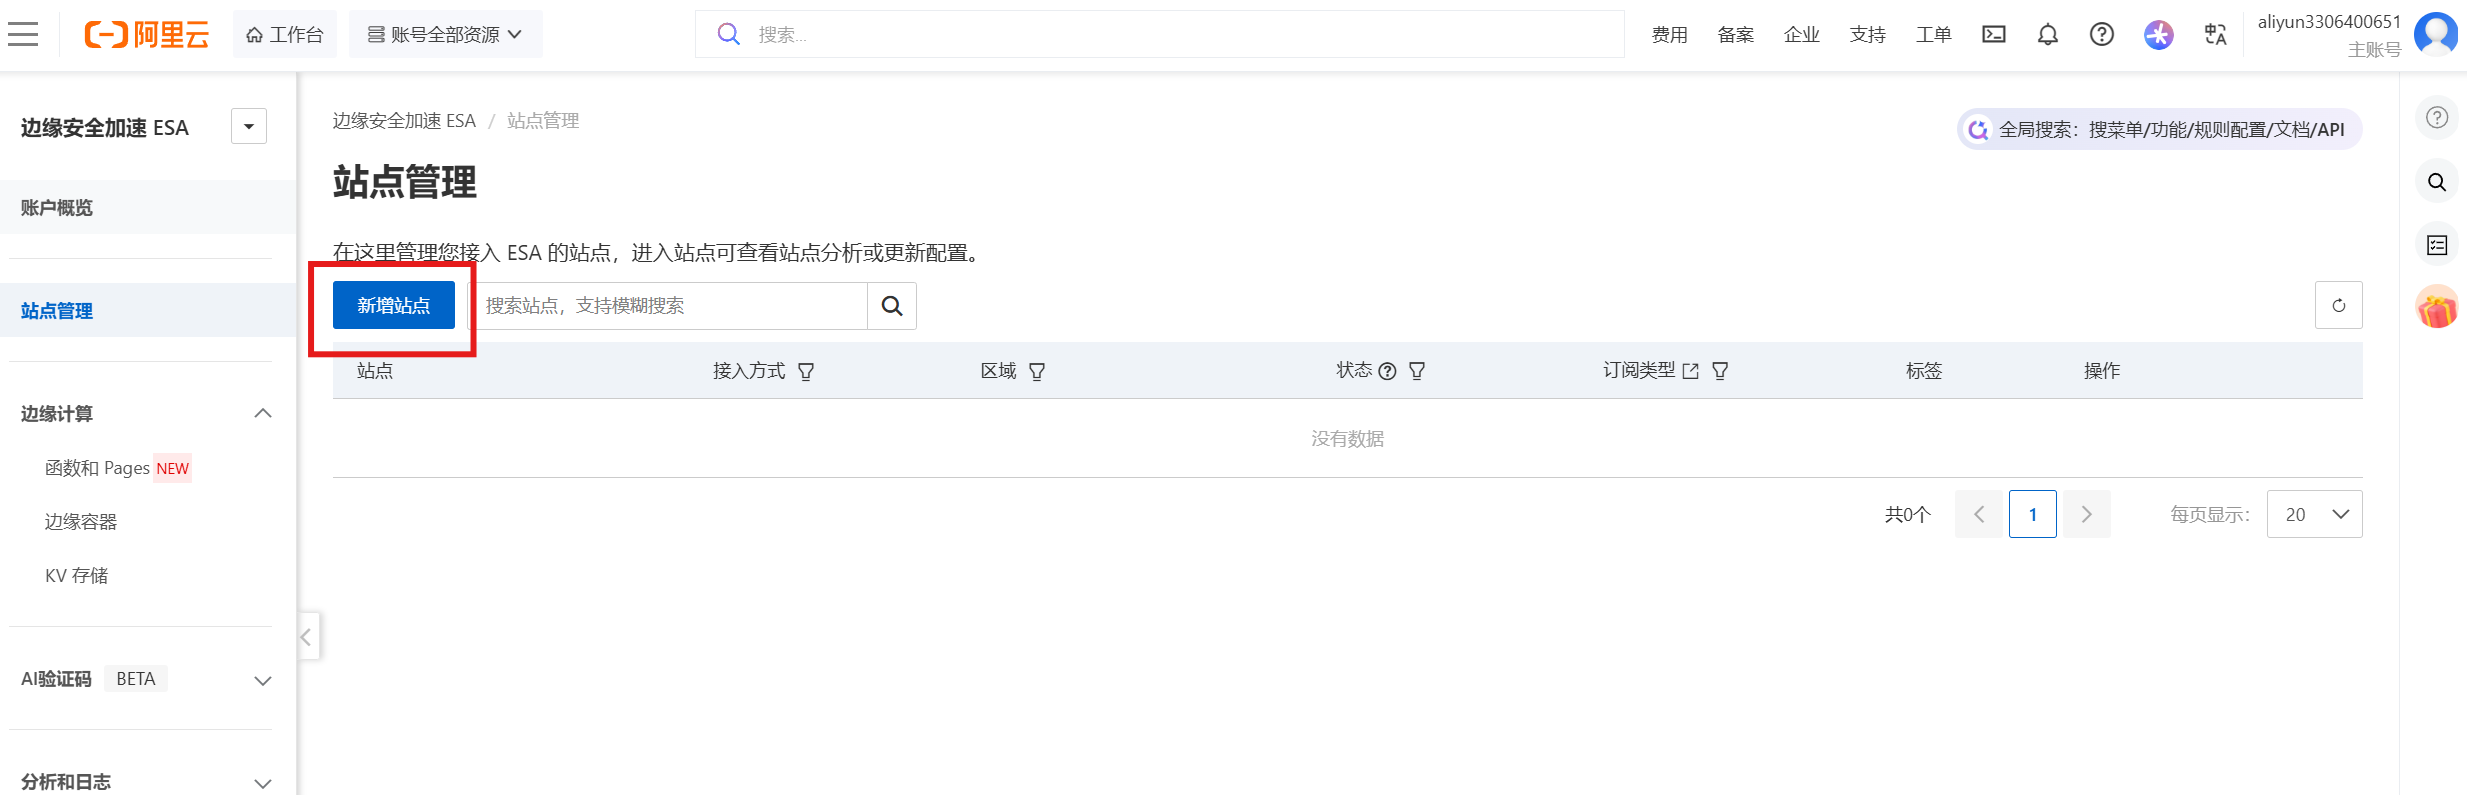
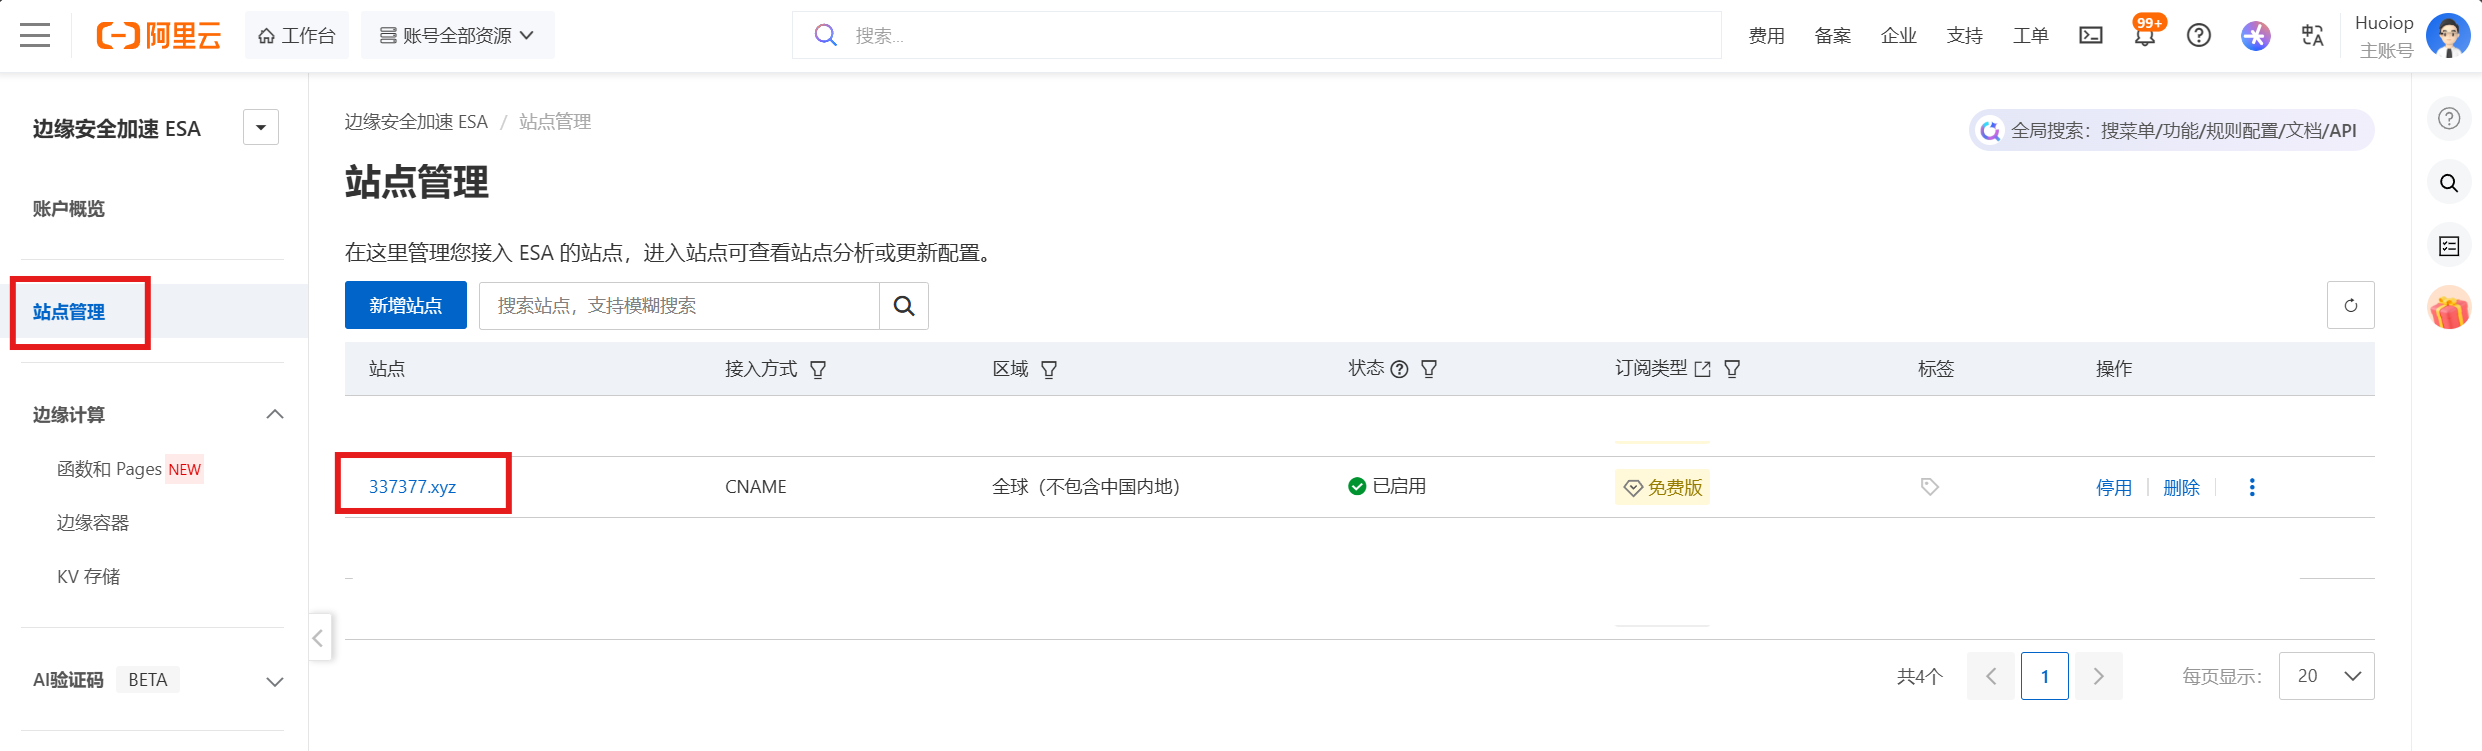
1 访问 ESA 站点管理,点击新增站点
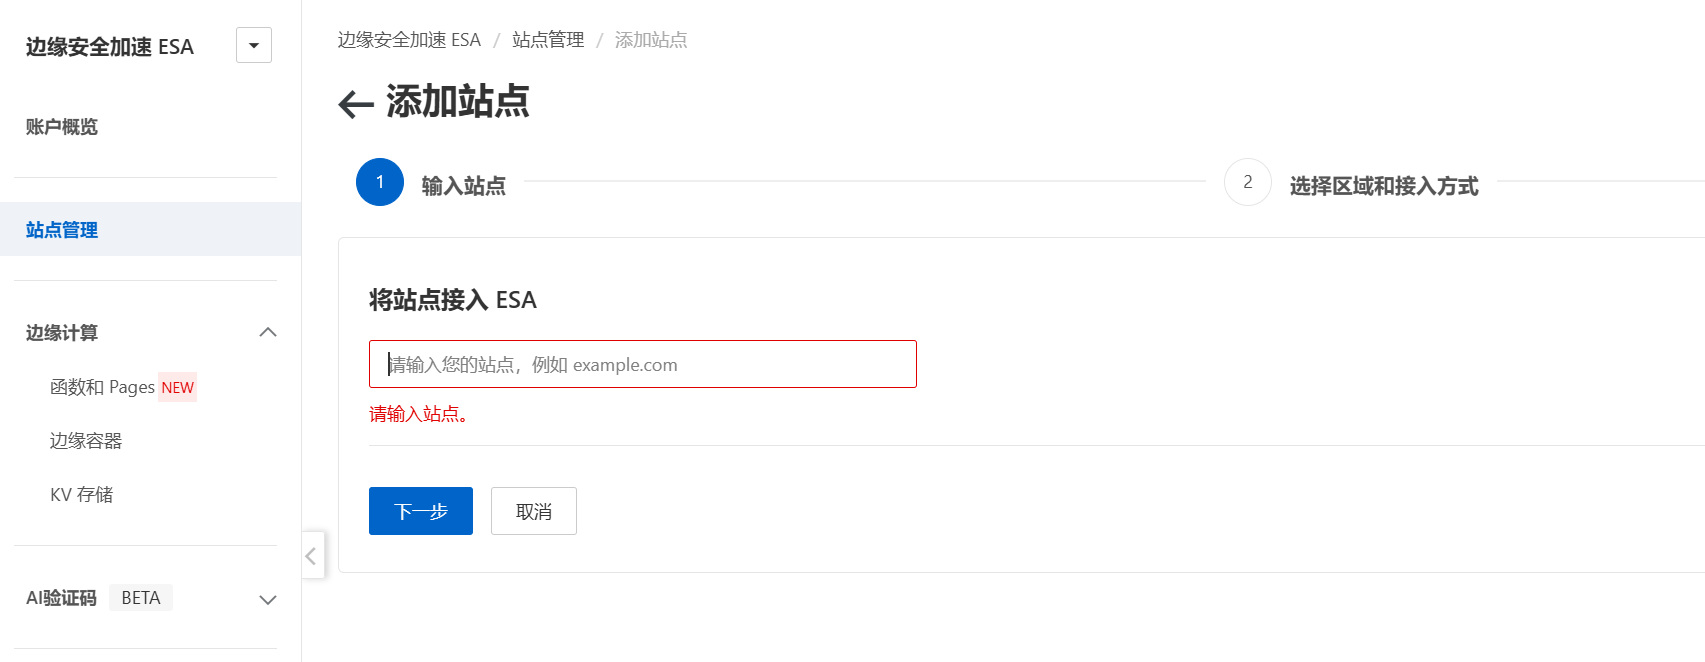
2 输入待保护的根域名(举例 你想让 https://api.huoiop.cn/get.php 受到验证码保护,那么此处你需要输入的是 huoiop.cn 而不是 api.huoiop.cn)
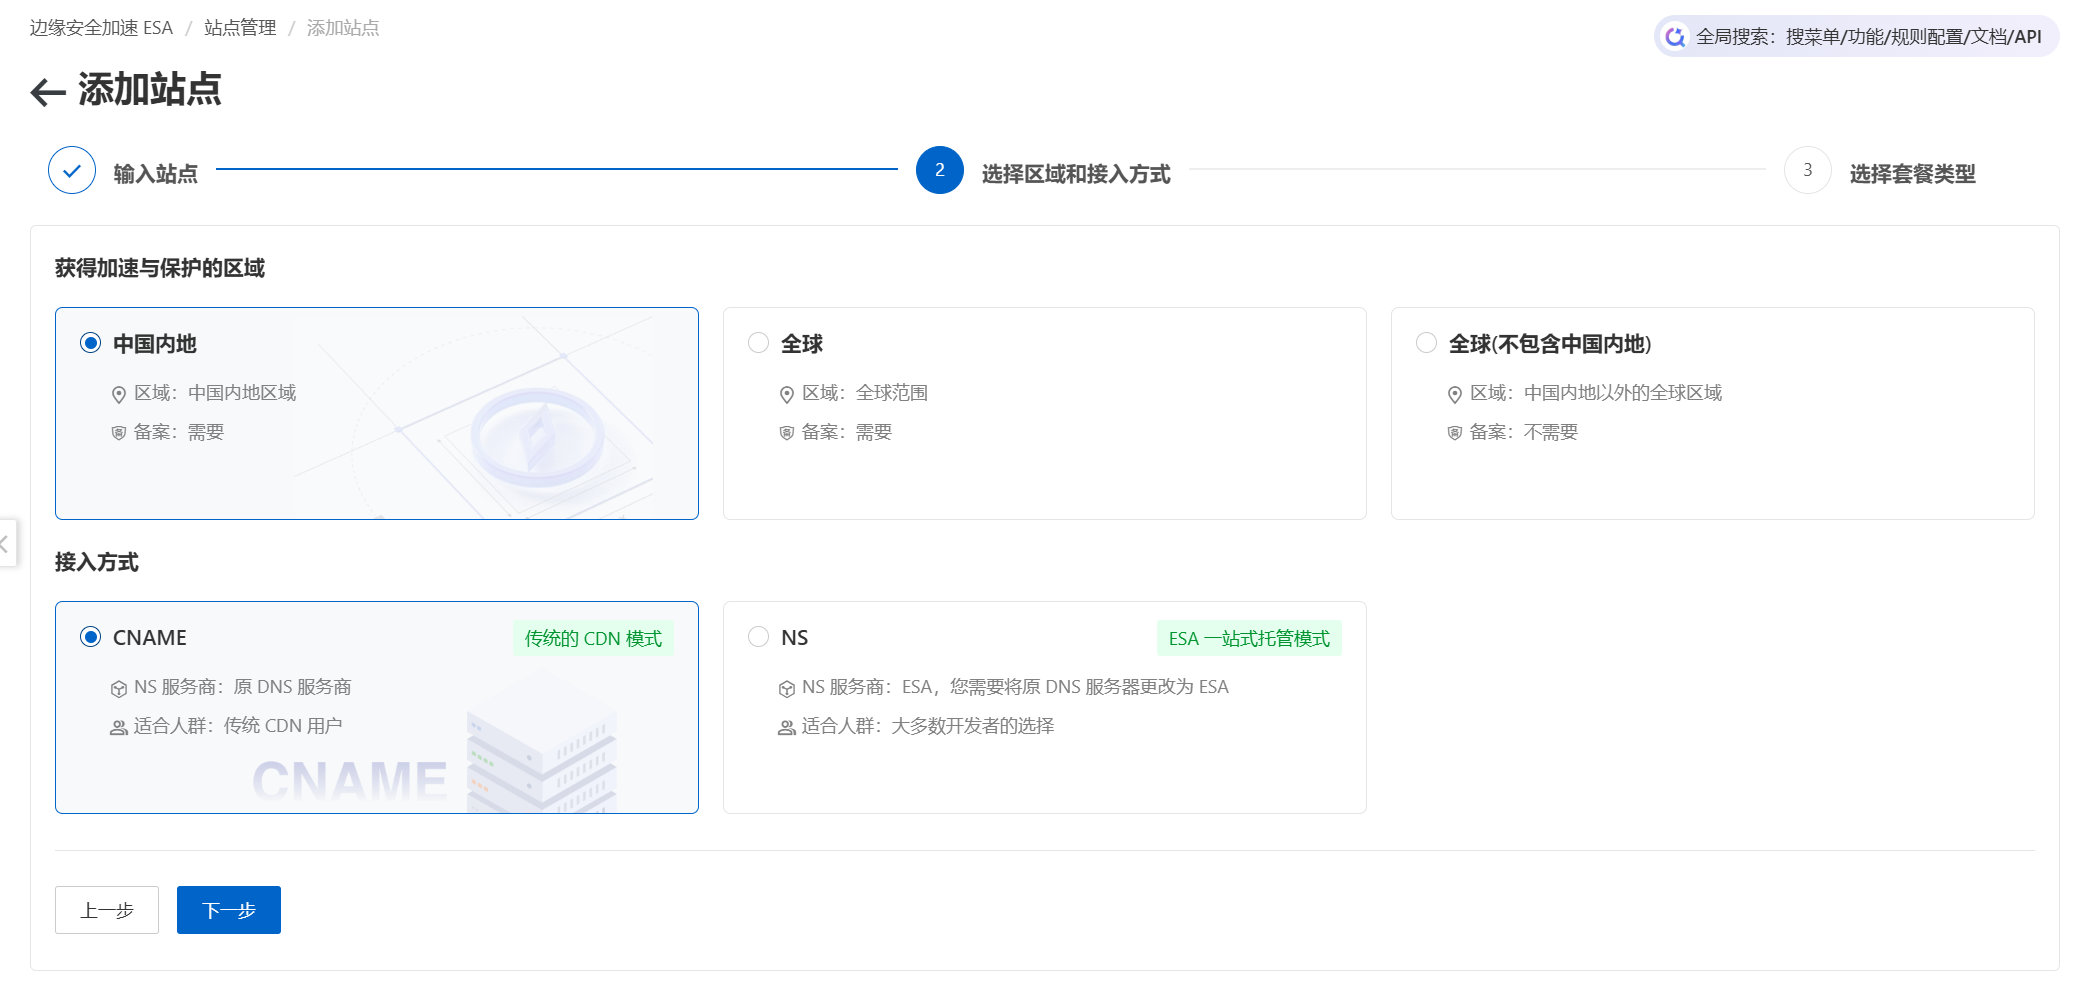
3 这里根据需要选择区域和接入方式,如果你仅仅只是想让一个子域名接入 ESA 的话,那么一般选择 CNAME 接入方式
4 这里选择免费版,每个账户初始拥有1个免费站点额度。然后点击完成并支付

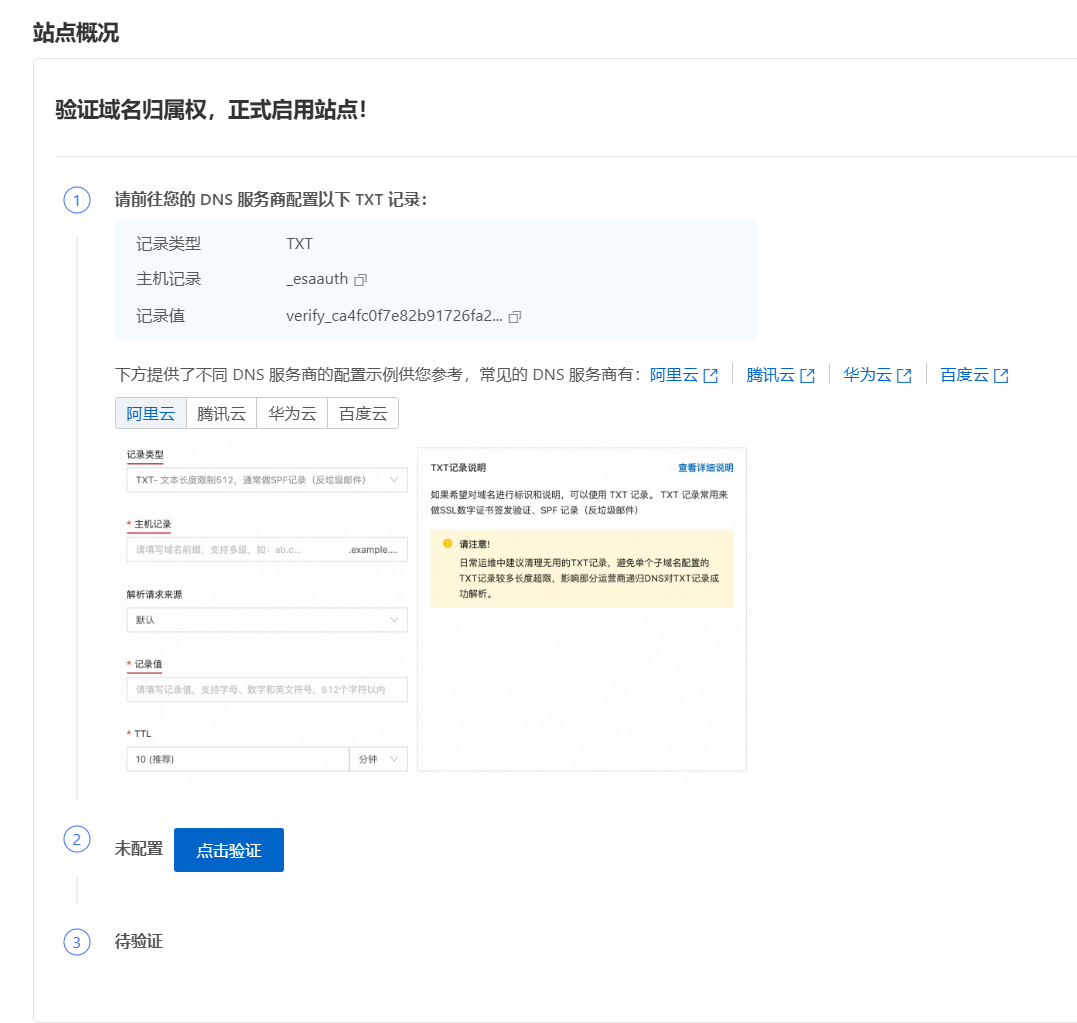
5 如果选择是 CNAME 接入的话,按照提示在 DNS服务商 处添加对应的 CNAME 记录
你都买域名了应该也会这个吧,这里就不细讲了(
6 完成添加后,回到 站点管理,点击你刚添加的域名
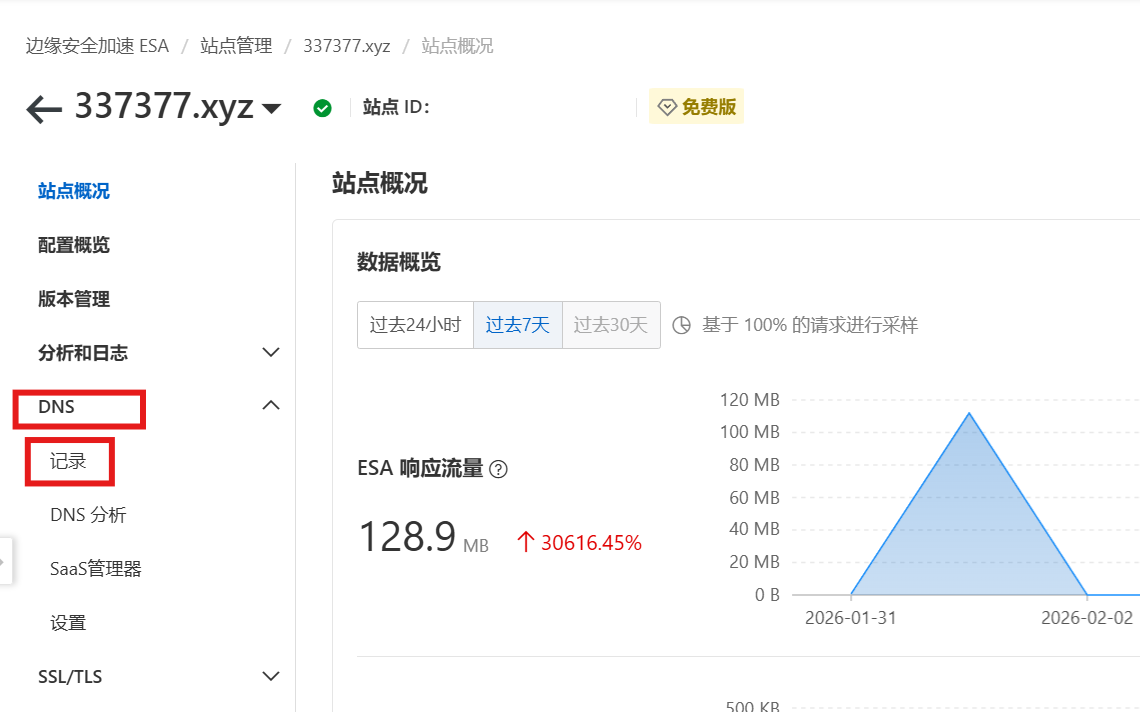
7 点击左边栏的DNS,再点击二级菜单中的记录
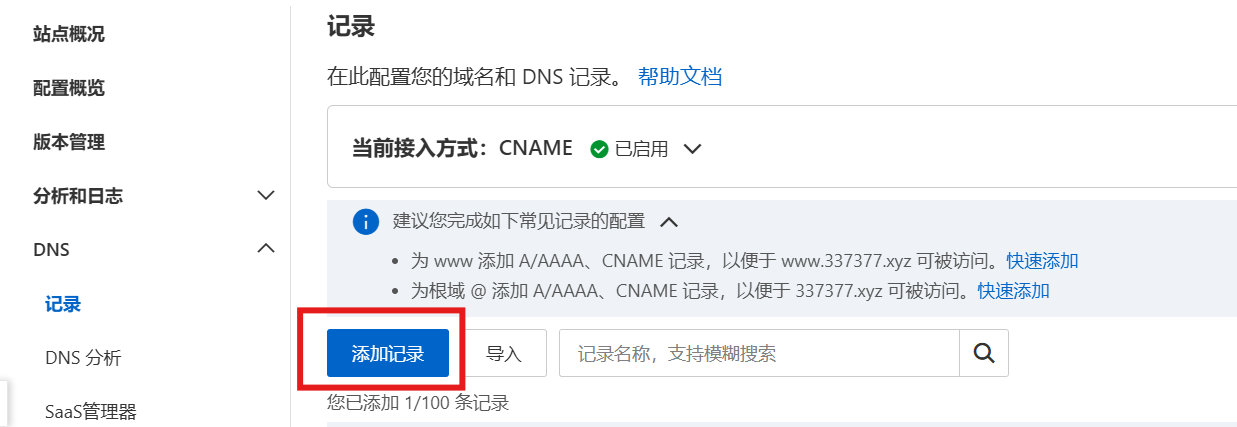
8 点击添加记录
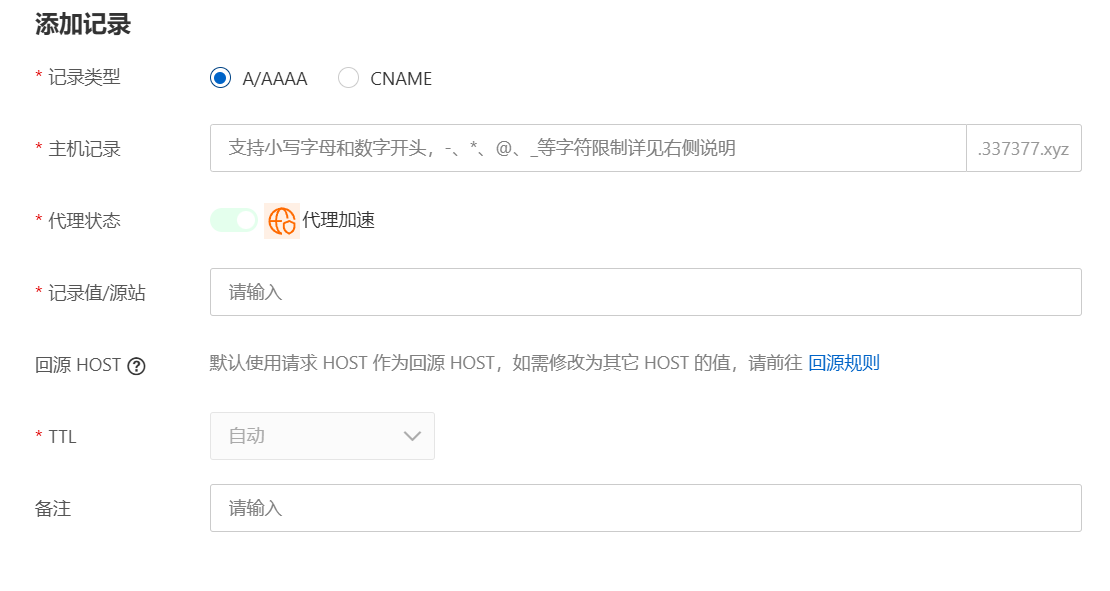
9 如果你待使用验证码保护的URL为 api.huoiop.cn/get.php,那么你需要添加主机记录为 api ,记录值为你的源站域名/IP(如 example.com 或 11.45.1.4)的记录
配置验证码
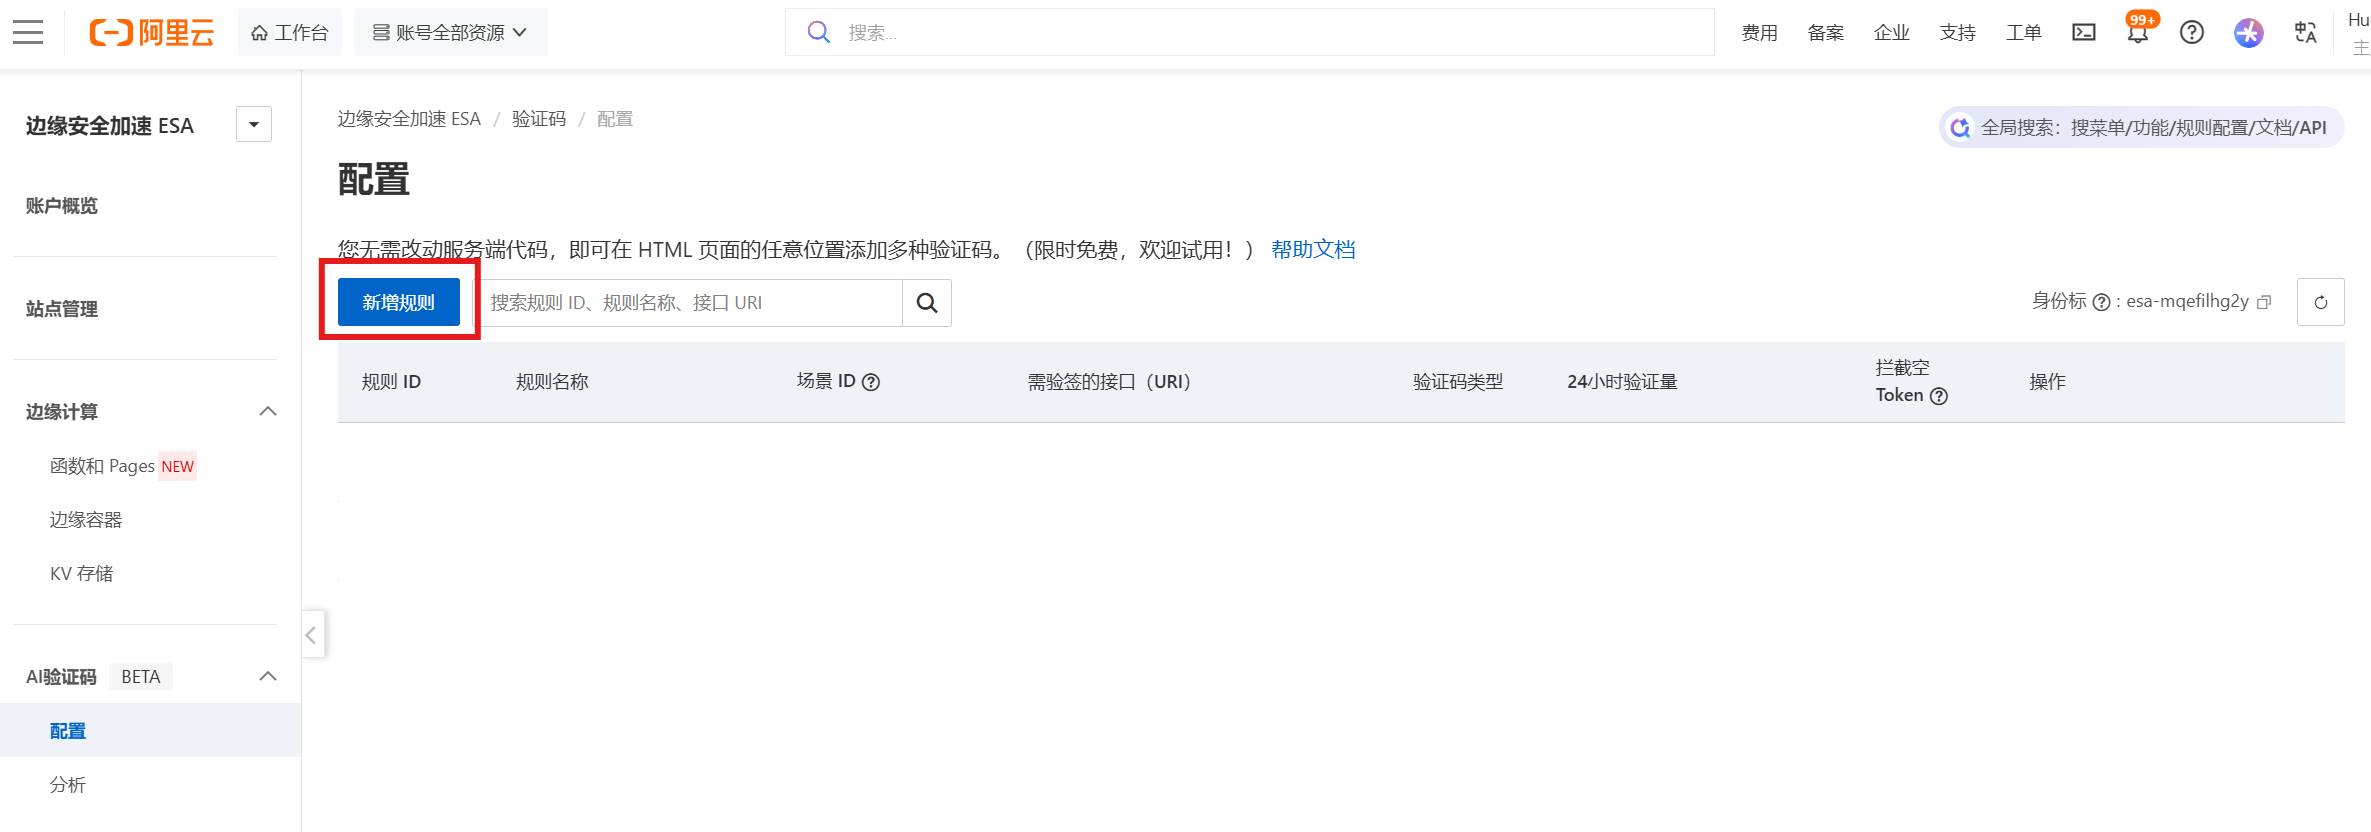
1 访问 ESA AI 验证码配置,点击新增规则
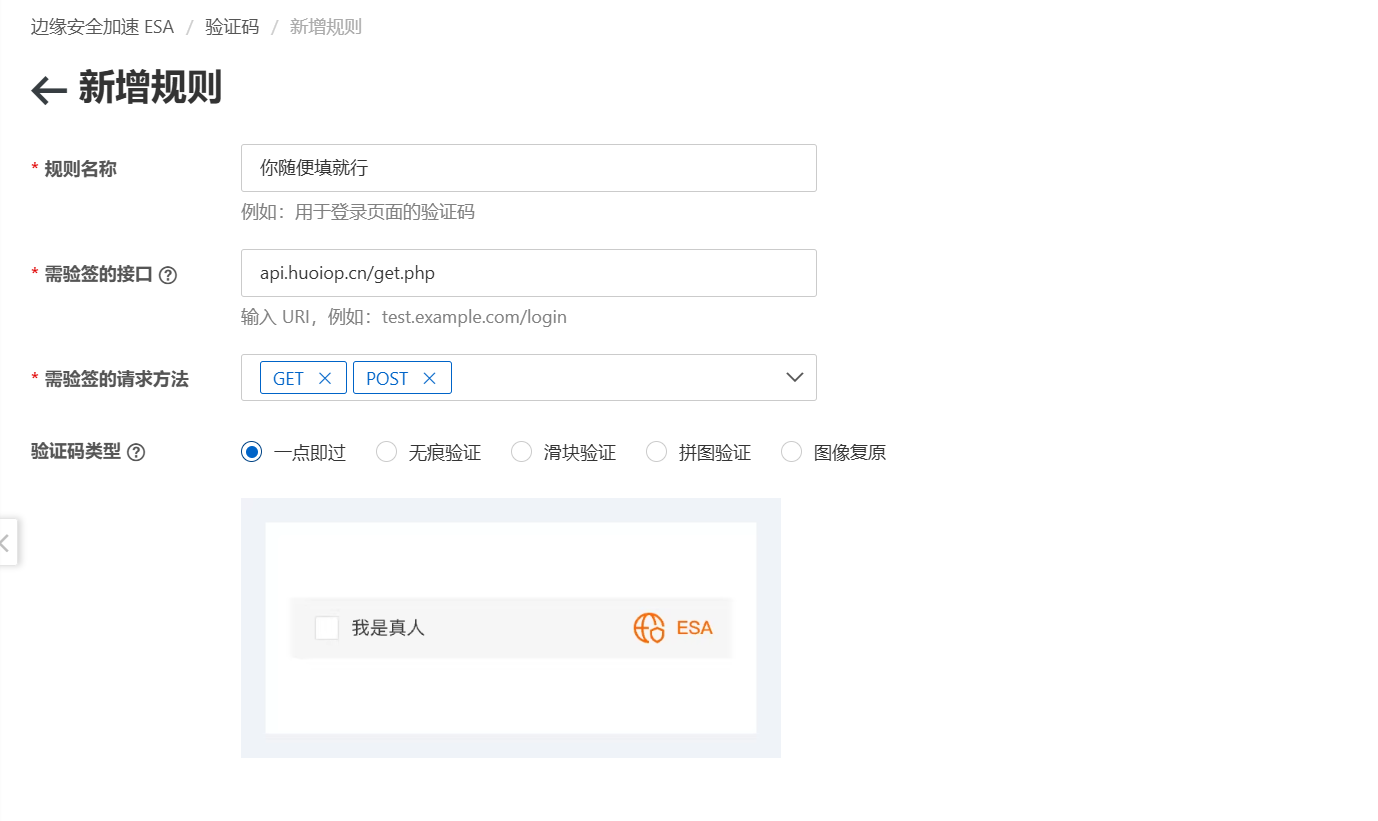
2 规则名称随便填,需验签的接口填需要验证码保护的URI(注意,此URI必须接入ESA。如你想给 api.huoiop.cn 添加验证码保护,则必须通过 NS/CNAME 任一一种方式在 ESA 中添加了 DNS记录,且代理状态为开启)
下面的验证码类型根据自己的需求来填
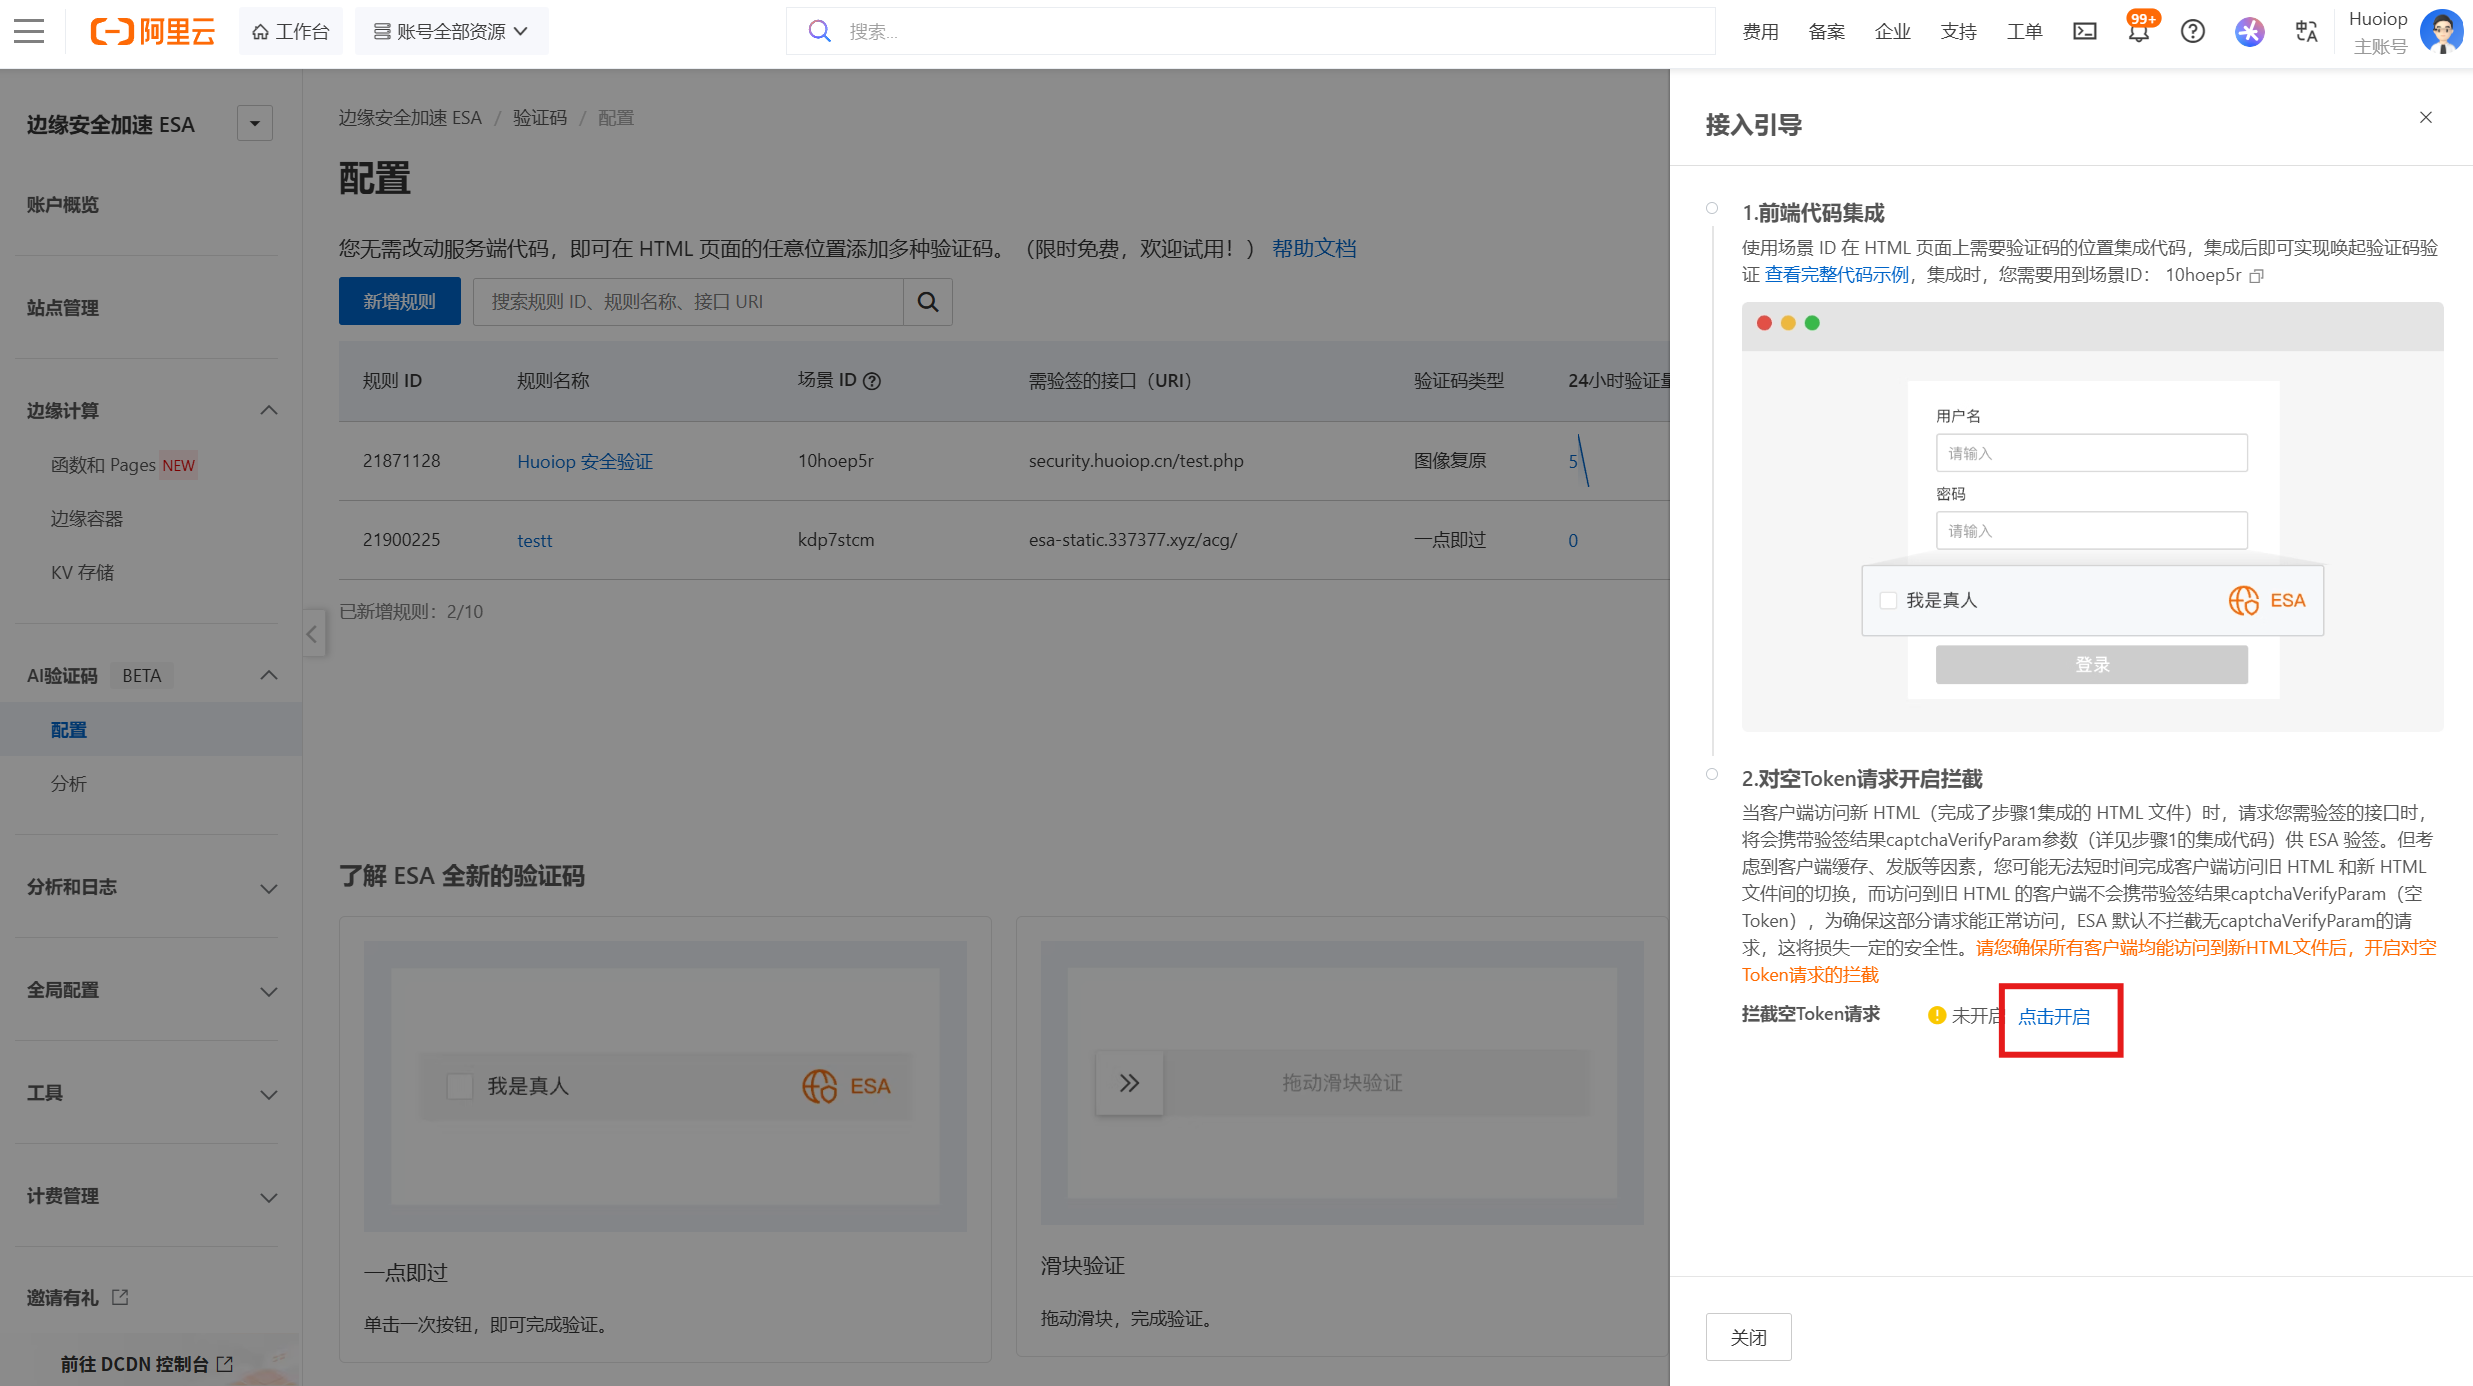
3 完成后建议开启 拦截空Token请求,从而实现强制人机验证(没进行人机验证绝对会被拦截)的目的
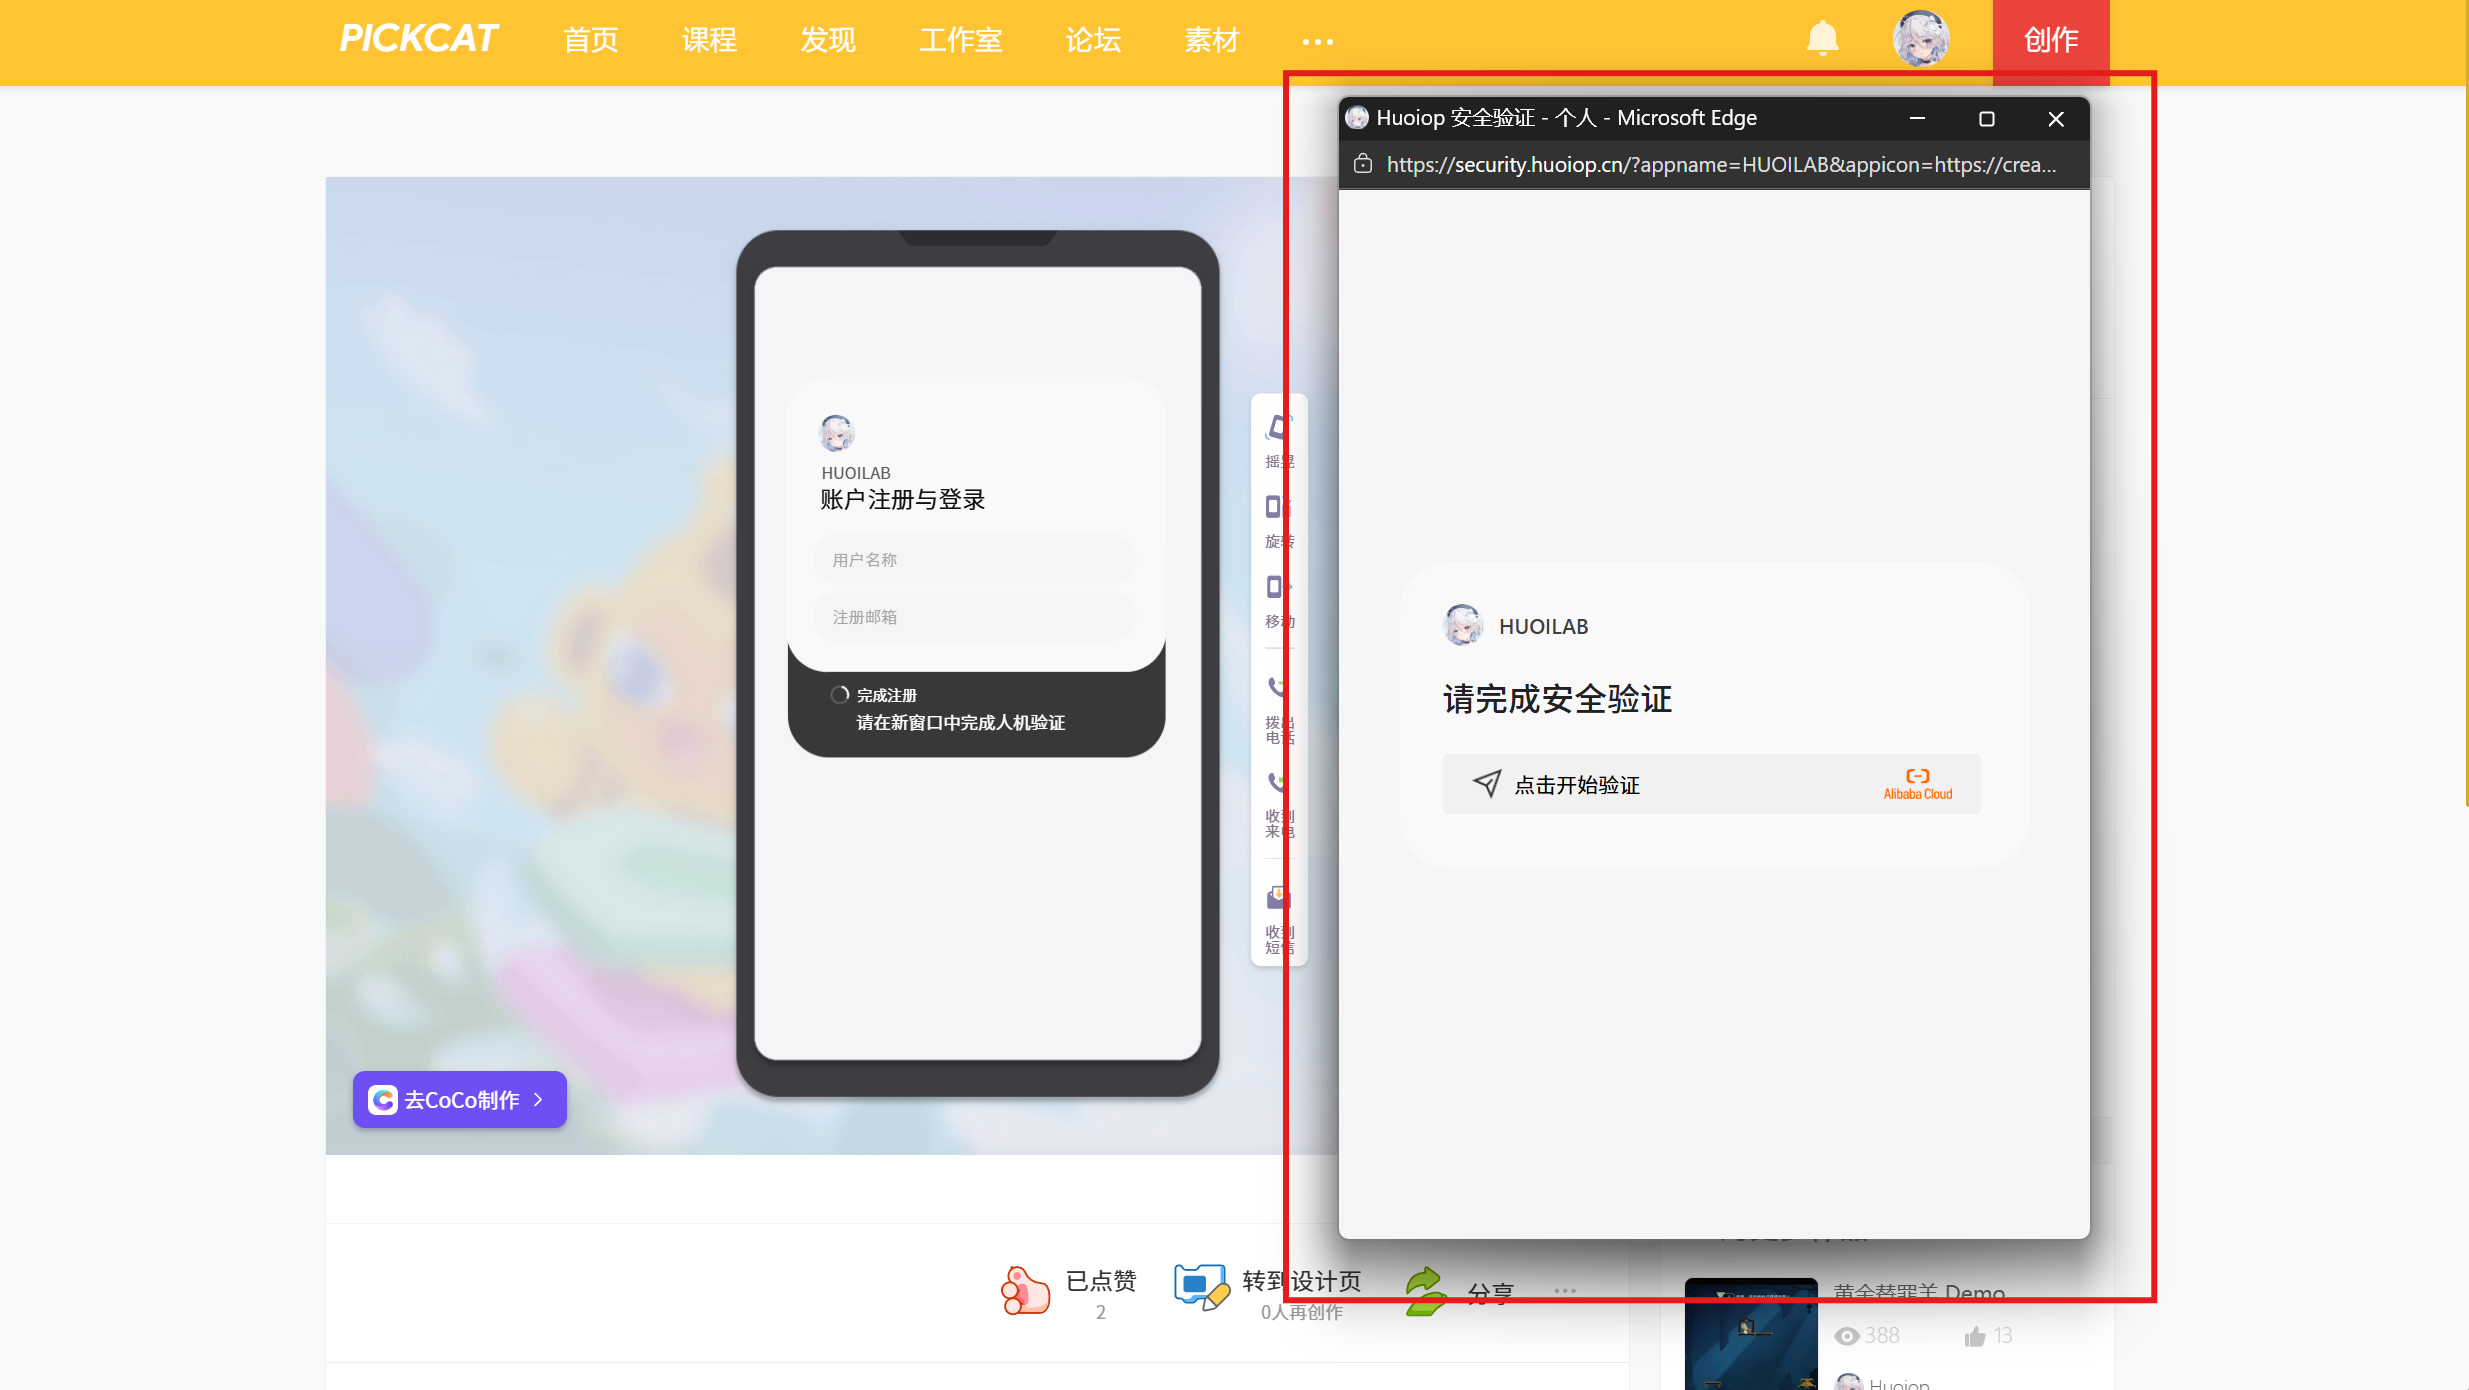
验证码页面的配置
效果图 (图中红框框出来的就是接下来要实现的)
将以下静态页面修改后部署到你的服务器/虚拟主机/任意Pages托管(如 CloudFlare Pages/EO Pages/Github Pages)
<!doctype html>
<html lang="zh-CN">
  <head>
    <meta charset="UTF-8" />
    <title>Huoiop 安全验证</title>
    <link rel="icon" href="./favicon.ico">
    <meta name="viewport" content="width=device-width, initial-scale=1.0" />

    <style>
      html,
      body {
        margin: 0;
        padding: 0;
        width: 100%;
        height: 100%;
        background: #f5f5f7;
        font-family:
          -apple-system, BlinkMacSystemFont, "Segoe UI", Roboto,
          "Helvetica Neue", Arial, sans-serif;
        display: flex;
        align-items: center;
        justify-content: center;
      }

      /* 中央卡片 */
      .card {
        width: 420px;
        max-width: calc(100% - 32px);
        background: #f9f9f9;
        border-radius: 33px;
        padding: 28px 28px 32px;
        box-sizing: border-box;
      }

      /* 顶部:图标 + 应用名 */
      .app-header {
        display: flex;
        align-items: center;
        gap: 10px;
        margin-bottom: 18px;
      }

      .app-icon {
        width: 28px;
        height: 28px;
        border-radius: 100px;
        object-fit: cover;
        background: #ddd;
      }

      .app-name {
        font-size: 14px;
        color: #3c4043;
        font-weight: 500;
      }

      /* 主标题 */
      .title {
        font-size: 22px;
        font-weight: 500;
        color: #202124;
        margin: 6px 0 22px;
      }

      /* 验证码容器 */
      #captcha-container {
        width: 100%;
        display: flex;
        justify-content: flex-start;
      }
    </style>

    <!-- ESA 全局配置(必须在 SDK 前) -->
    <script>
      window.AliyunCaptchaConfig = {
        region: "cn",
        prefix: "改为你的实际身份标",
      };
    </script>

    <!-- ESA SDK -->
    <script src="https://o.alicdn.com/captcha-frontend/aliyunCaptcha/AliyunCaptcha.js"></script>
  </head>
  <body>
    <div class="card">
      <div class="app-header">
        <img id="app-icon" class="app-icon" />
        <div id="app-name" class="app-name">应用</div>
      </div>

      <div class="title">请完成安全验证</div>

      <div id="captcha-container"></div>
    </div>

    <script>
      /* 读取 URL 参数 */
      const params = new URLSearchParams(location.search);
      const appName = params.get("appname") || "应用";
      const appIcon = params.get("appicon");

      document.getElementById("app-name").textContent = appName;

      if (appIcon) {
        document.getElementById("app-icon").src = appIcon;
      } else {
        document.getElementById("app-icon").style.display = "none";
      }

      /* 向宿主窗口发送消息 */
      function notify(payload) {
        if (window.opener && !window.opener.closed) {
          window.opener.postMessage(payload, "*");
        }
      }

      function initCaptcha() {
        window.initAliyunCaptcha({
          SceneId: "改为你的场景ID",
          mode: "embed",
          element: "#captcha-container",
          language: "cn",

          slideStyle: {
            width: 360,
            height: 40,
          },

          success(captchaVerifyParam) {
            // 发送消息给宿主窗口
            notify({
              type: "esa-captcha-success",
              captchaVerifyParam,
            });

            // 修改主标题文本
            const titleEl = document.querySelector(".title");
            if (titleEl) {
              titleEl.textContent = "请返回原页面以继续";
            }
          },

          fail(result) {
            notify({
              type: "esa-captcha-fail",
              error: result || {},
            });
          },

          onError(errorInfo) {
            notify({
              type: "esa-captcha-error",
              error: errorInfo || {},
            });
          },

          server: [
            "captcha-esa-open.aliyuncs.com",
            "captcha-esa-open-b.aliyuncs.com",
          ],
        });
      }

      window.addEventListener("DOMContentLoaded", initCaptcha);
    </script>
  </body>
</html>
场景ID
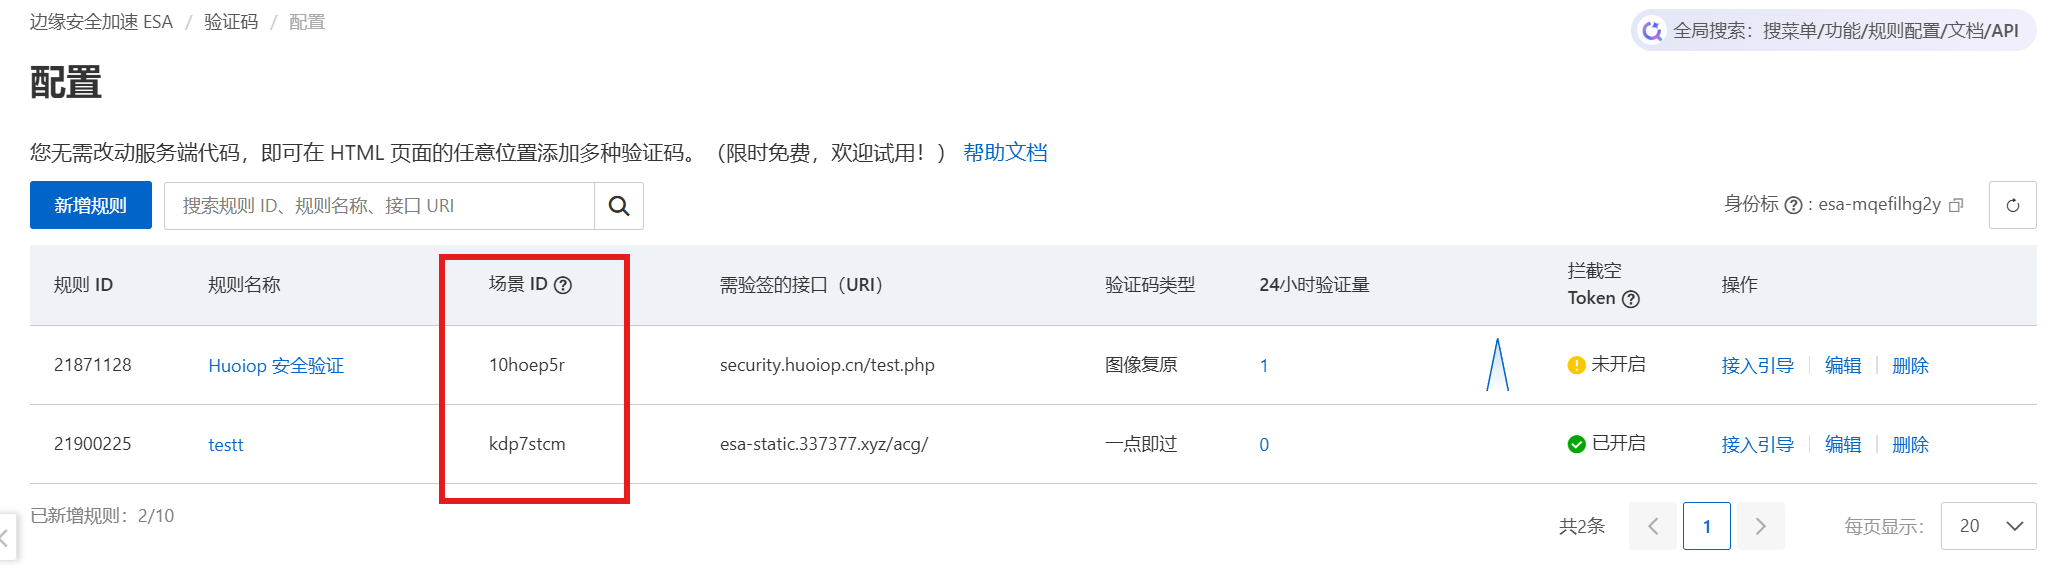
身份标

如何请求后端接口?
请求受验证码保护的后端接口时,需携带参数 captcha-verify-param (用户完成验证码验证后,返回的 验证令牌 securityToken)(securityToken为原始响应中的键,返回给Coco的键为captchaVerifyParam)
如 请求 https://security.huoiop.cn/test.php 时,直接请求会被 403 拦截,
而携带有效验证令牌(未过期且未使用)请求 https://security.huoiop.cn/test.php?captcha-verify-param=xxxxxxxxx 才可正常请求。
Coco 对接
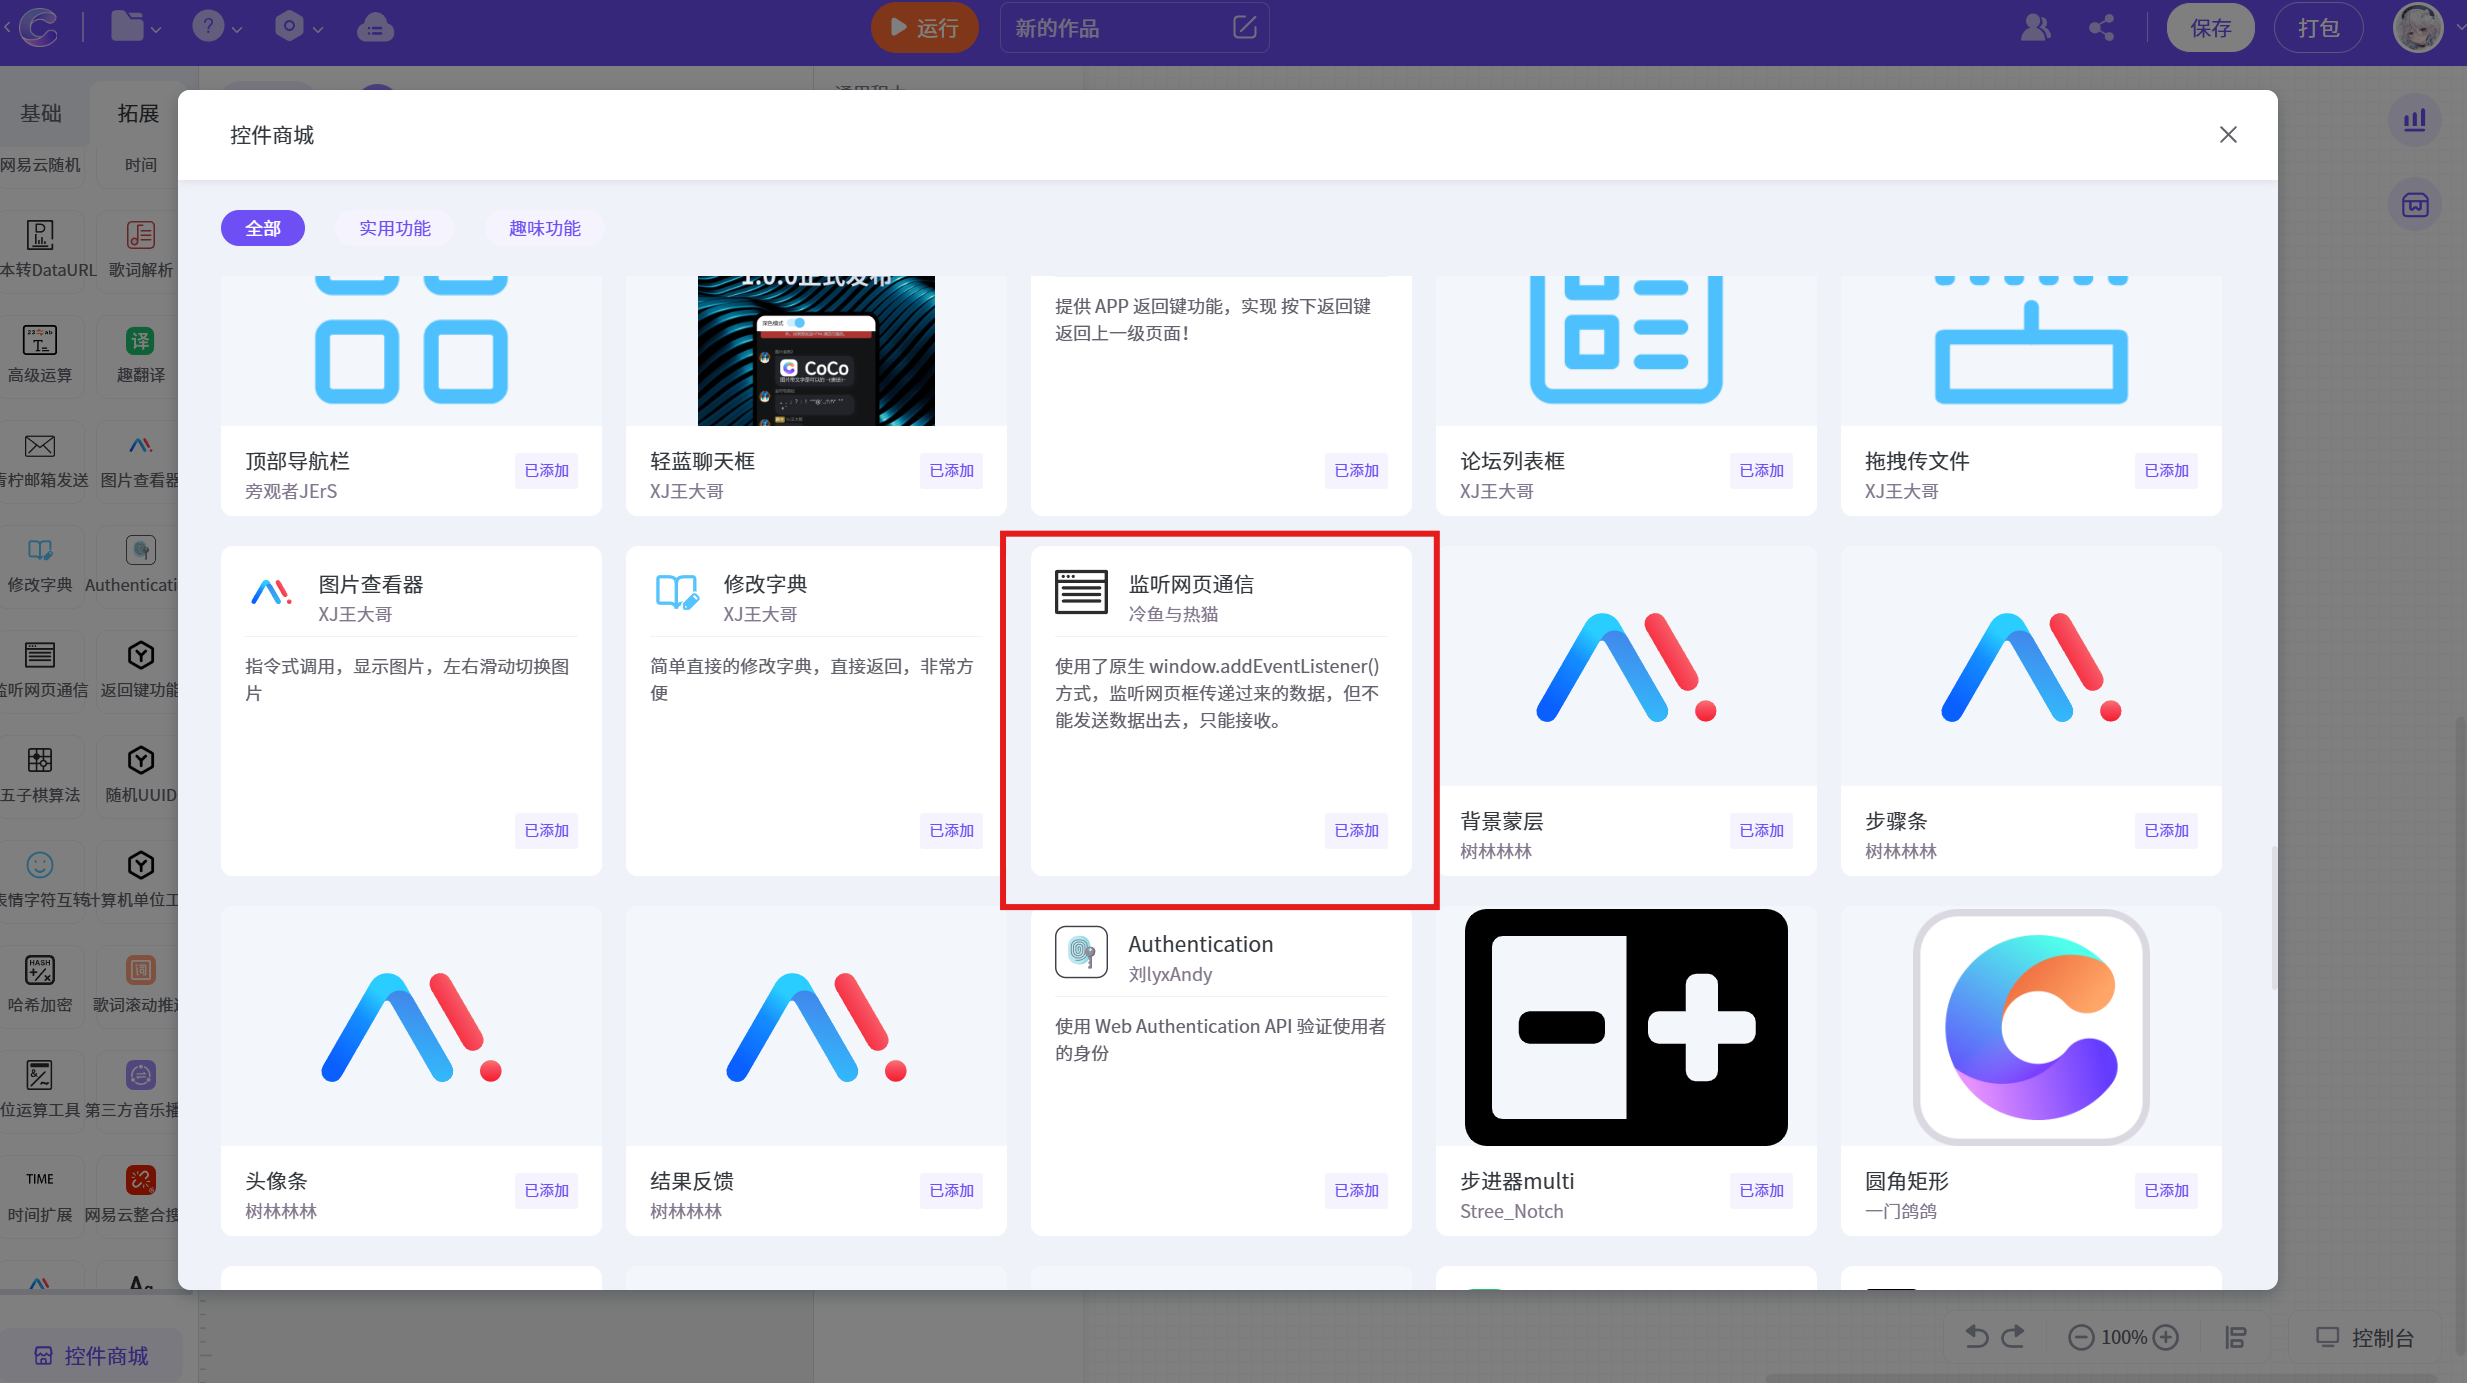
1 添加控件商城中的控件 监听网页通信。
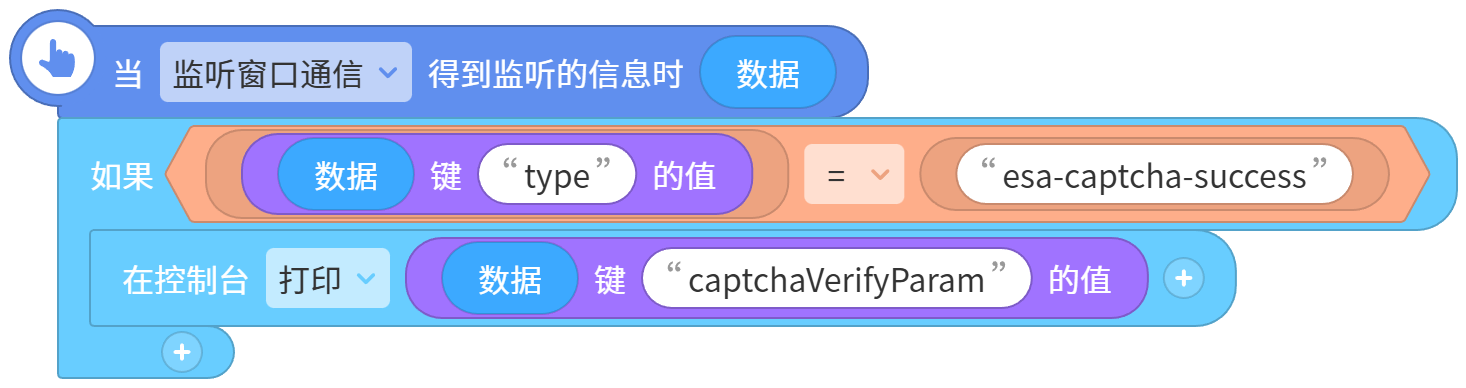
2 网址中填写部署验证码界面的URL 。

3 添加接收信息的事件。其中 captchaVerifyParam 的值即为验证令牌。
type 的值为 esa-captcha-success 时,表示用户完成了验证(type还有其他的值,这里只对成功的情况做处理)。
4 对后端接口发出请求,记得携带参数 captcha-verify-param,值为刚获取的验证令牌。

Comments NOTHING